Effective team collaboration on Facebook is crucial for any business's online strategy. Facebook Business Manager simplifies this process by allowing page owners to share admin rights with other team members. In this guide, we'll walk you through the process of sending invitations to share admin rights in Business Manager, ensuring you maintain control while promoting teamwork.
Before inviting someone as an admin, it's important to understand the various roles available and the permissions associated with each. The admin role grants complete control over your Business Manager, including the ability to manage roles and settings.
Ensure Proper Access
Make sure you have full admin privileges yourself. Only users with full control can send invitations for admin rights.
Gather Necessary Information
You'll need the email address that the invitee uses to log into their Facebook account.
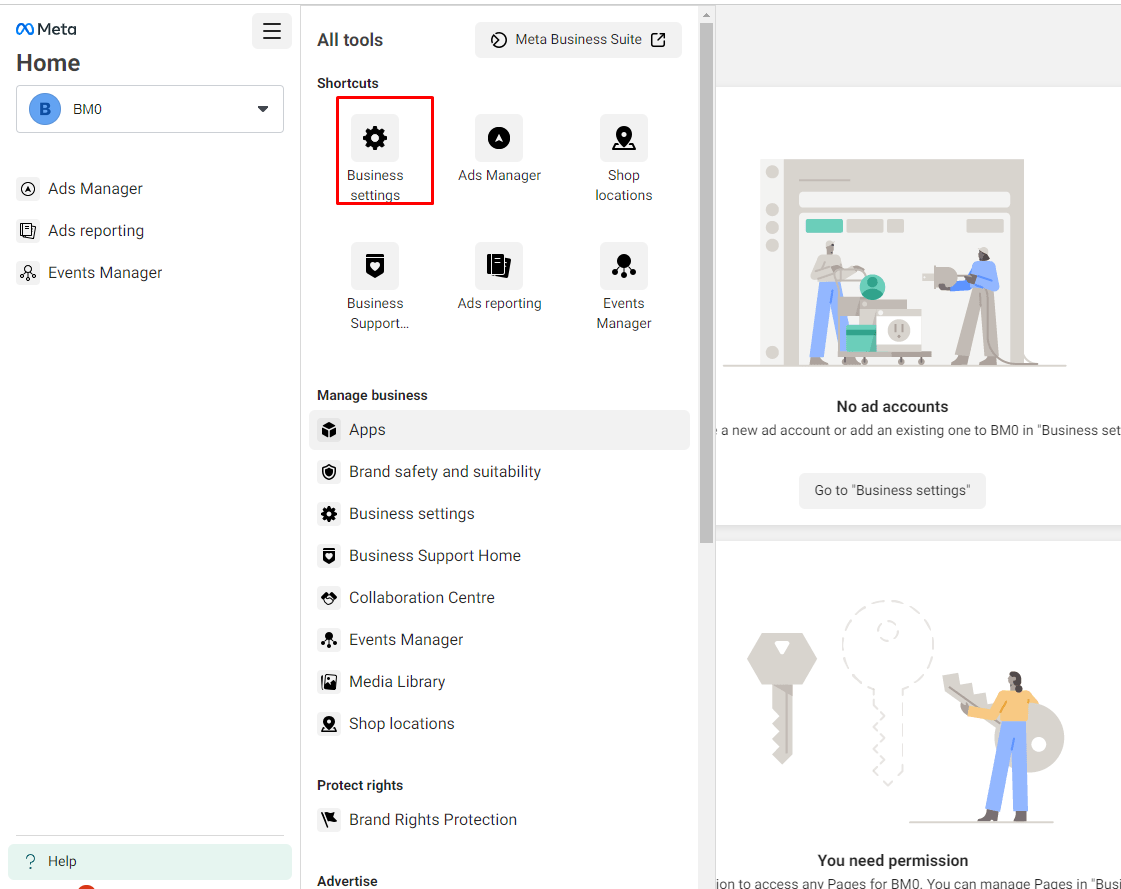
1) Navigate to Business Settings
Log into your Business Manager account and select 'Business Settings' from the top right corner.
2) Access the People Section
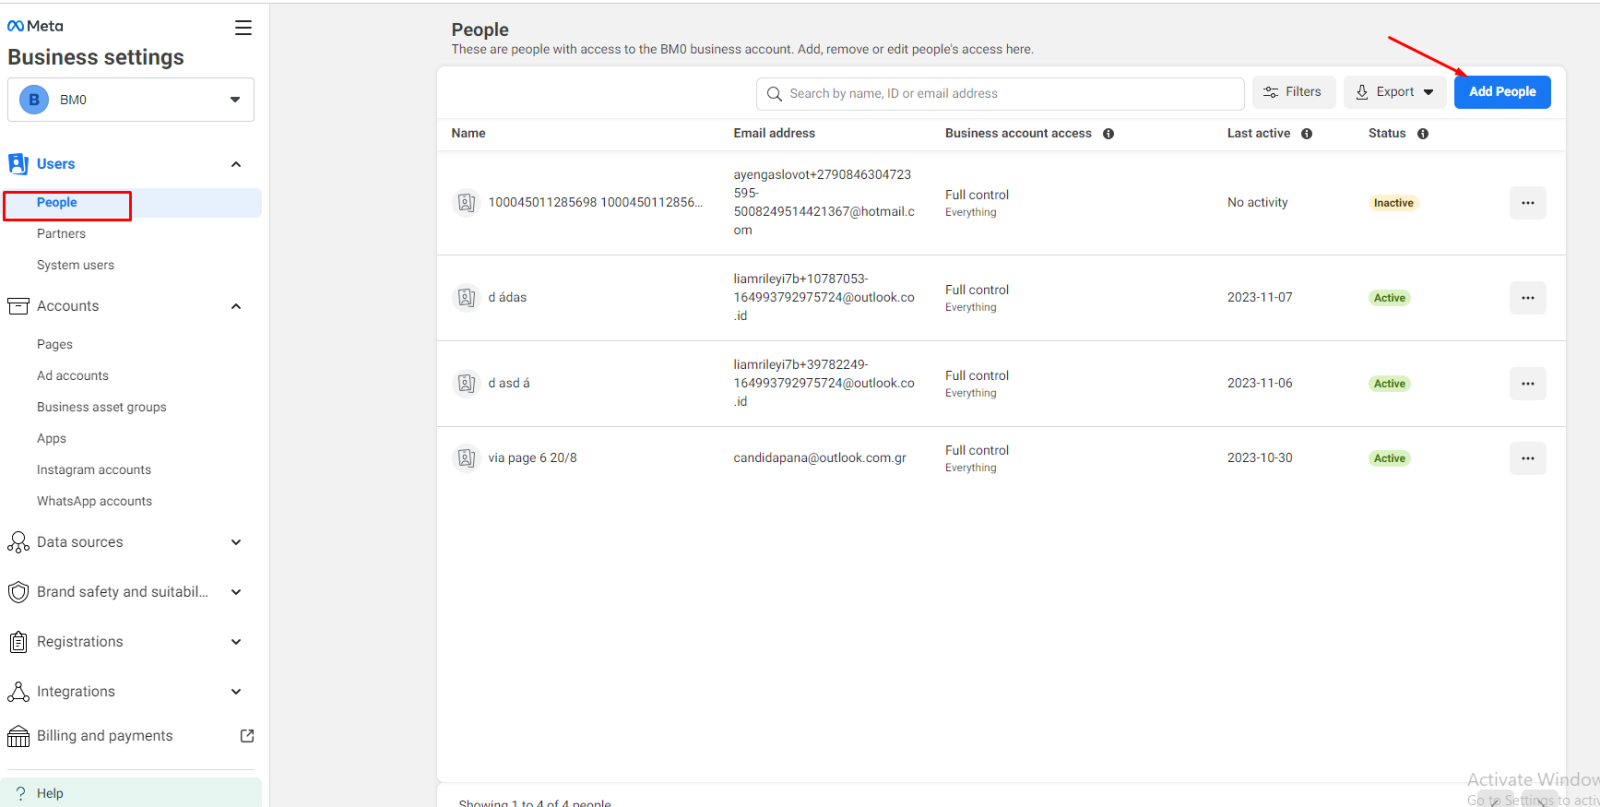
Within Business Settings, click on ‘People’ under the ‘Users’ section. Here you can see all the individuals that have some level of access to your Business Manager.
3) Add New Admins
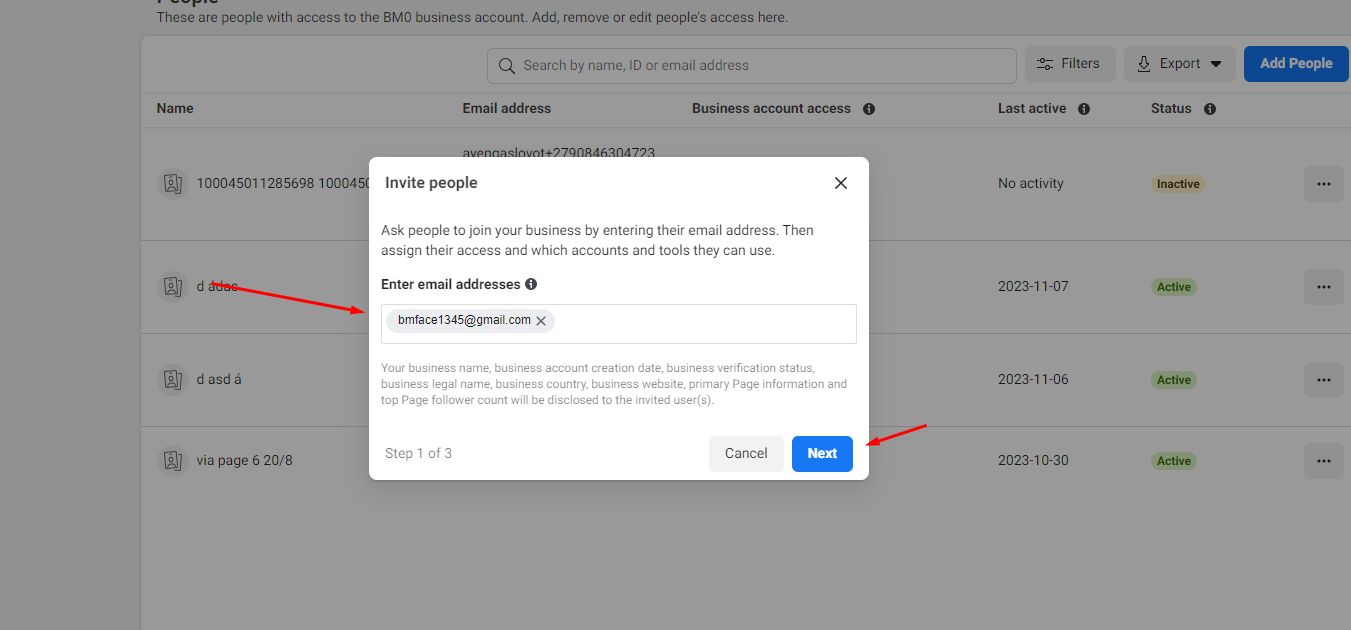
Click on the blue ‘Add’ button to invite a new admin. Enter the email address of the individual you wish to invite.
4) Assign the Admin Role
Select the role you want to assign. To give admin rights, choose ‘Admin’.
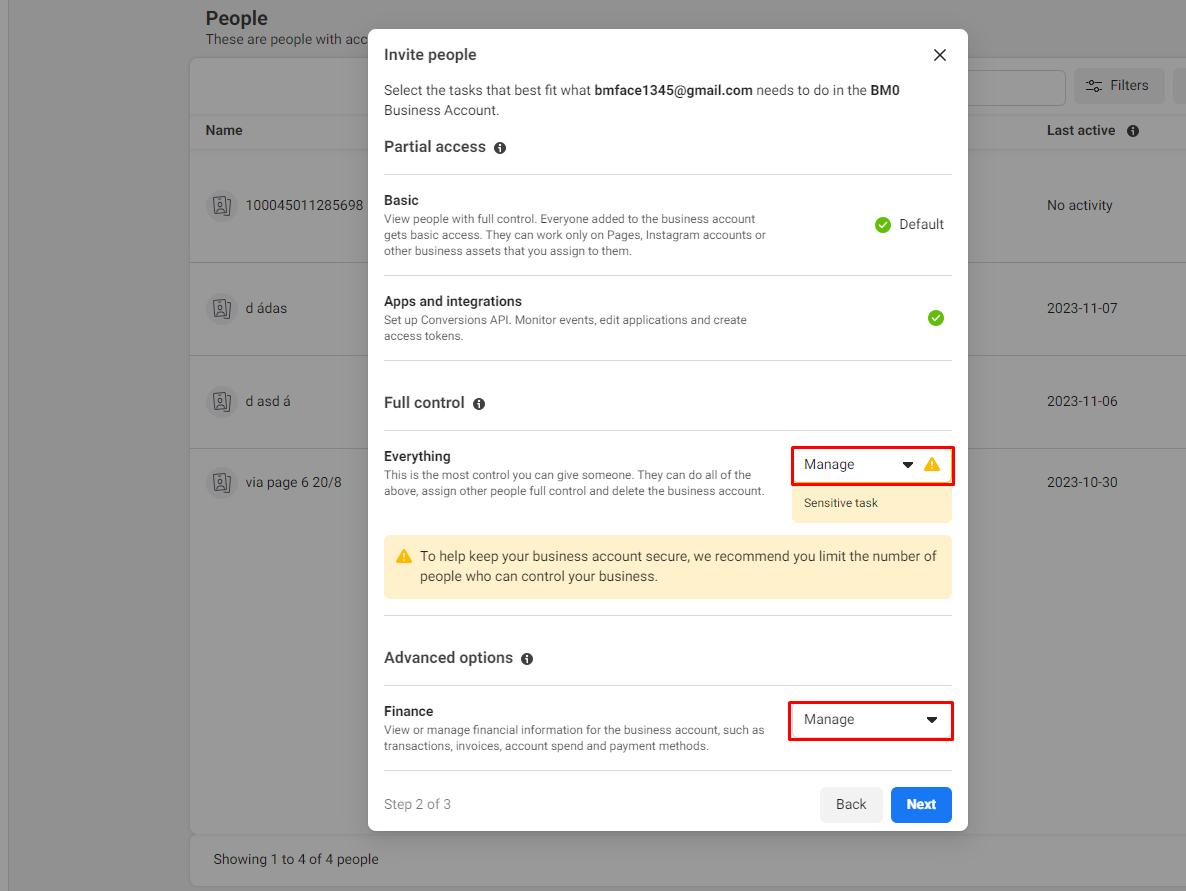
5) Send the Invitation
After selecting the role, click 'Next'. Review the permissions to ensure they are correct, then click ‘Invite’. An email invitation will be sent to the invitee to accept the admin role.
The invitee will receive an email with the invitation. They must click on the invitation link and follow the prompts to accept the admin role.

Conclusion:
Sharing admin rights in Facebook Business Manager should be done with consideration and care. By following the steps outlined in this guide, you can expand your team's capabilities while keeping your business's Facebook assets secure.

