Facebook Business Manager (BM) is an essential tool for companies looking to streamline their Facebook marketing efforts. Whether you've just purchased BM access from a website or you're setting it up for the first time, understanding its core features is crucial. This guide of Accnice provides a step-by-step approach to mastering the basics of BM, from user management to payment setup.
Understanding the Invitation:
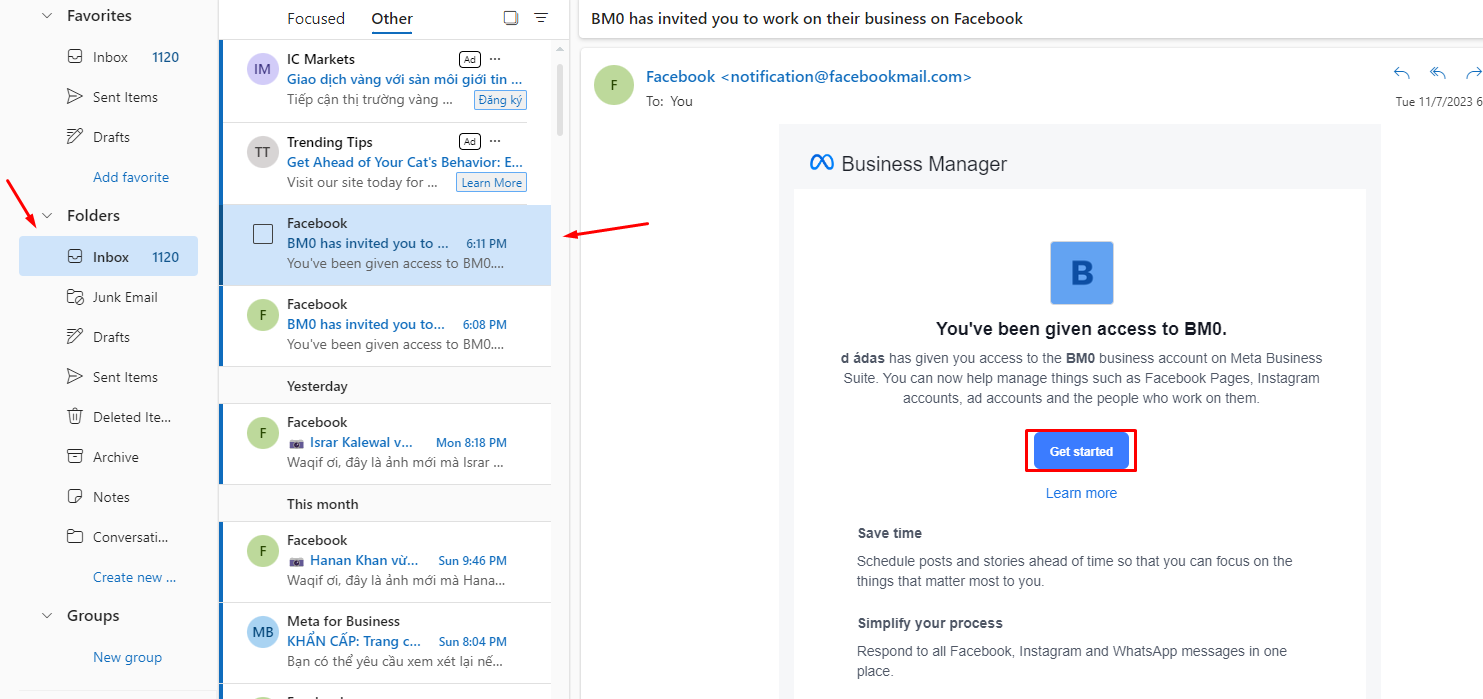
The invitation will include details about the BM you're being invited to and the role you've been assigned.
Ensure that the invitation is from a trusted source to avoid potential security issues.
Invitations to join a BM are typically sent via email or sometimes through direct messaging platforms.
Look for an email from Facebook with a subject line indicating an invitation to join a BM.
Step 1: Log Into Your Facebook Account
I have an article with basic login instructions for you here
Step 2: Follow the Shared Link
Click on the invitation link provided in the email or message.
You'll be redirected to a Facebook login page if you're not already signed in.
This will typically be the format we provide to you when you purchase a business manager account: 180700074748142|https://fb.me/2gdJWkJp8OtDyVH
180700074748142 is the ID of Business Manager (BM)
https://fb.me/2gdJWkJp8OtDyVH is the invitation link to join Business Manager
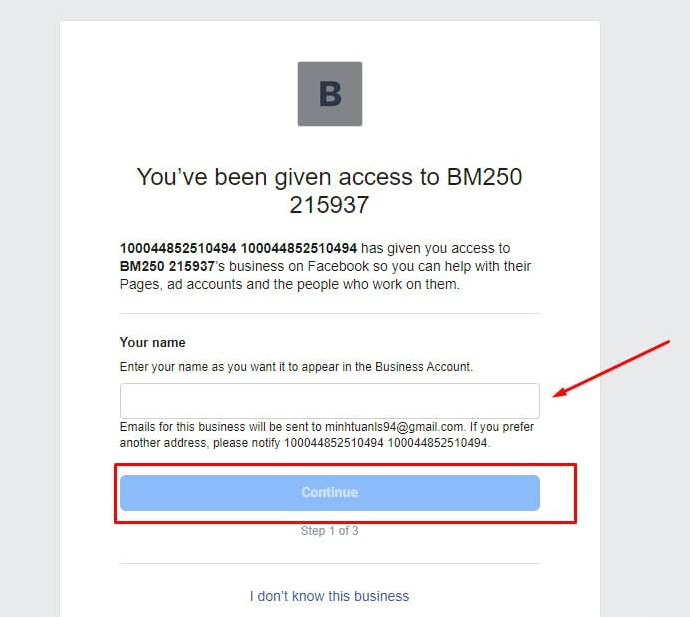
You just need to enter this link in a new tab in the browser where you logged into your proflile account
.png)
%20(1).png)
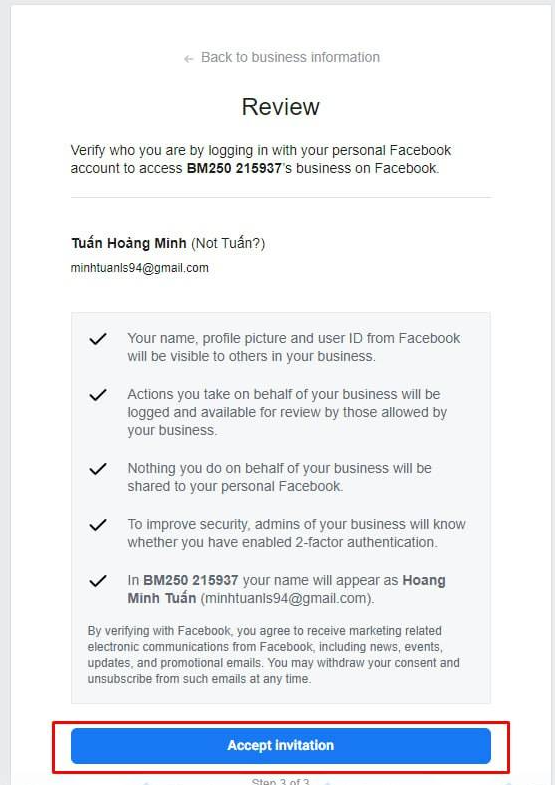
Once logged in, the link should take you directly to the specific BM you've been invited to.
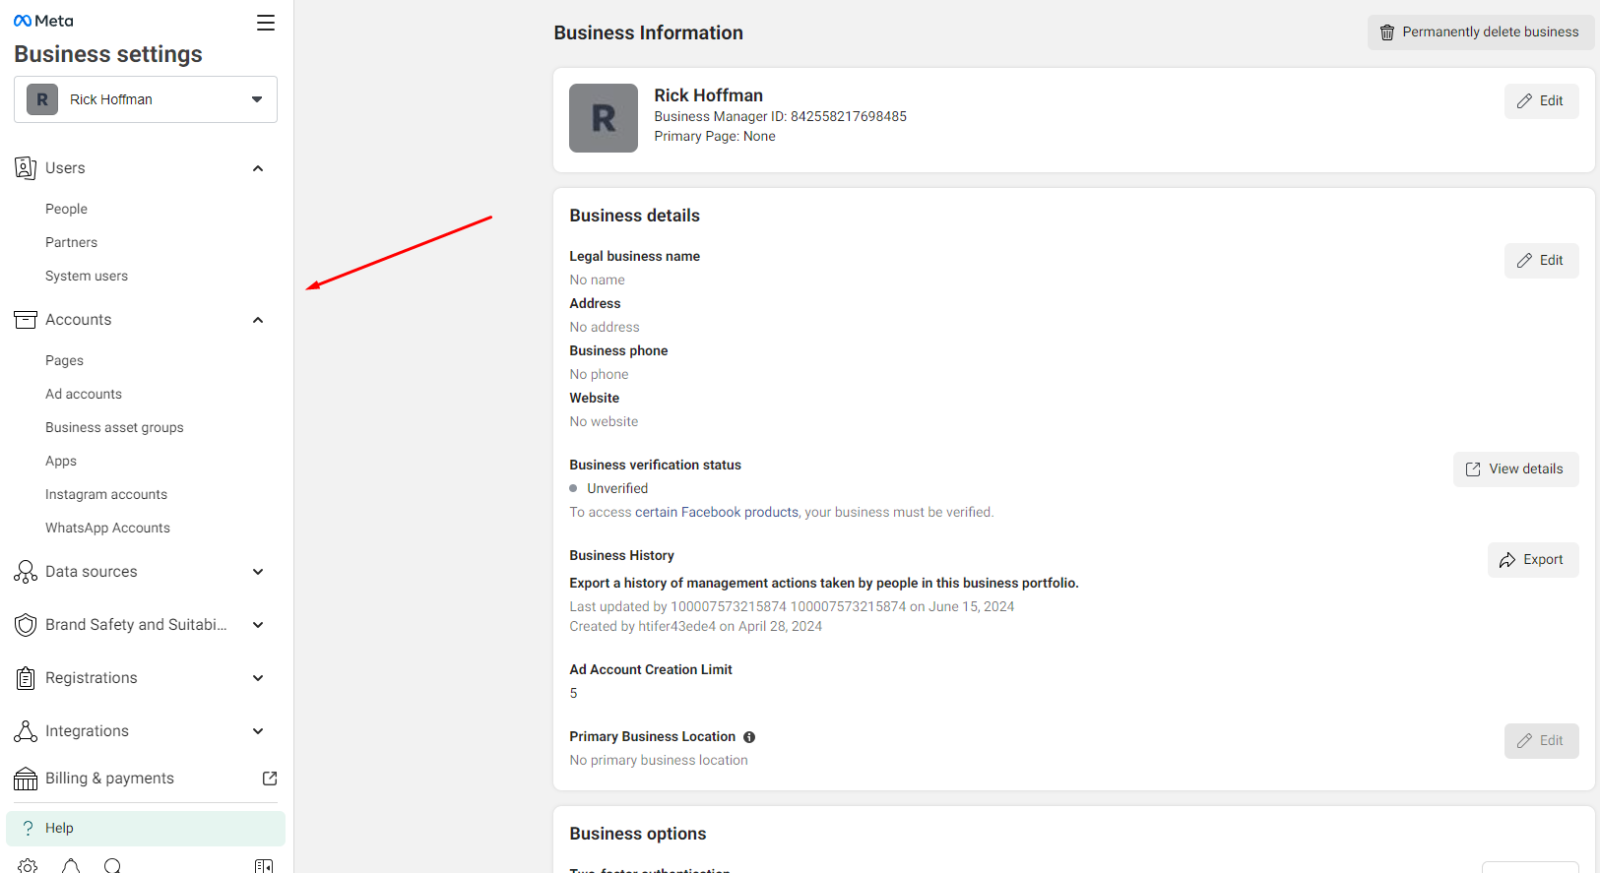
If not directed automatically, go to Business Settings in your BM dashboard.
Familiarize yourself with the dashboard, where you can access all the tools and settings.
Keep your business information up-to-date to maintain credibility and transparency.
User Management
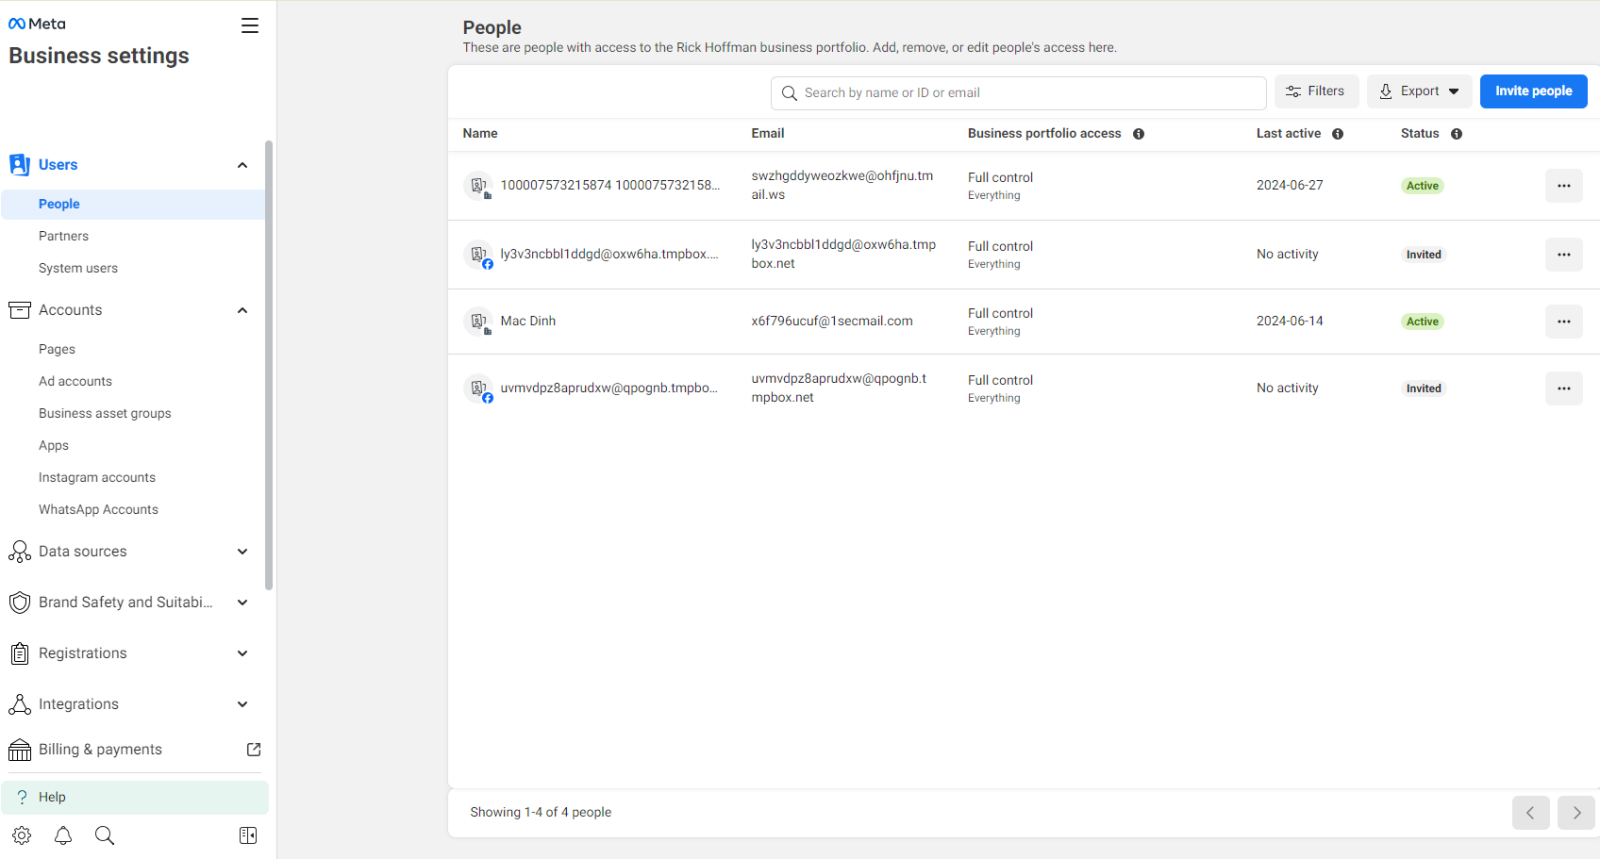
Understand the importance of having multiple administrators to prevent access issues.
Learn how to assign roles and responsibilities to your team members efficiently.
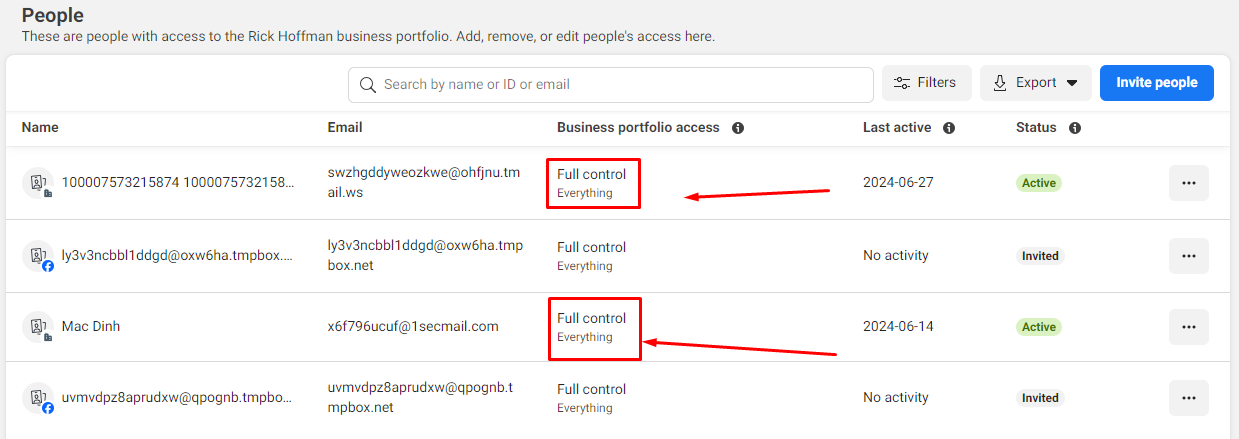
Each BM should have 2-3 administrators inside for better administration and in case someone appears in your BM and demotes you as an administrator or removes you from that BM.
I have attached a link to an article with instructions on how to add a new administrator to BM here, you can refer to it.
Create a new ad account or import an existing one into your BM.
Step-by-step instructions with pictures
.png)
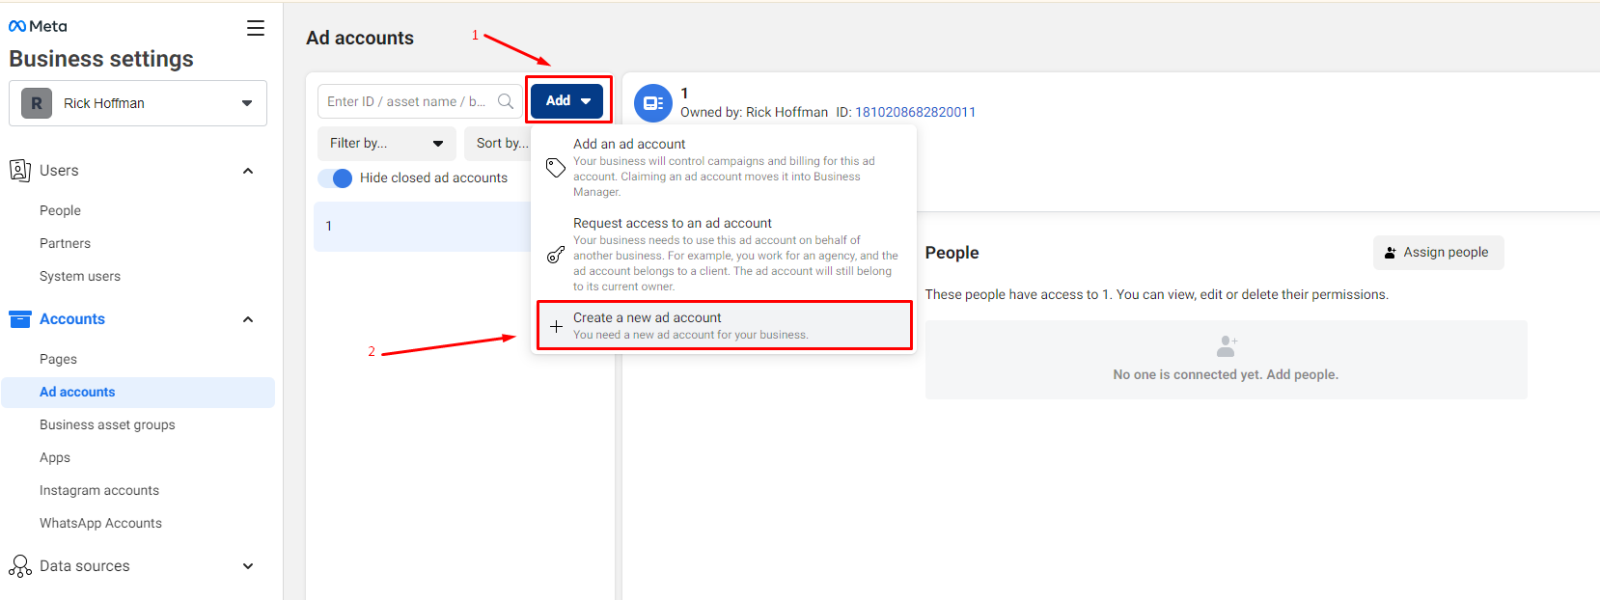

Add people to your ad account, ensuring they have the correct permissions based on their role.
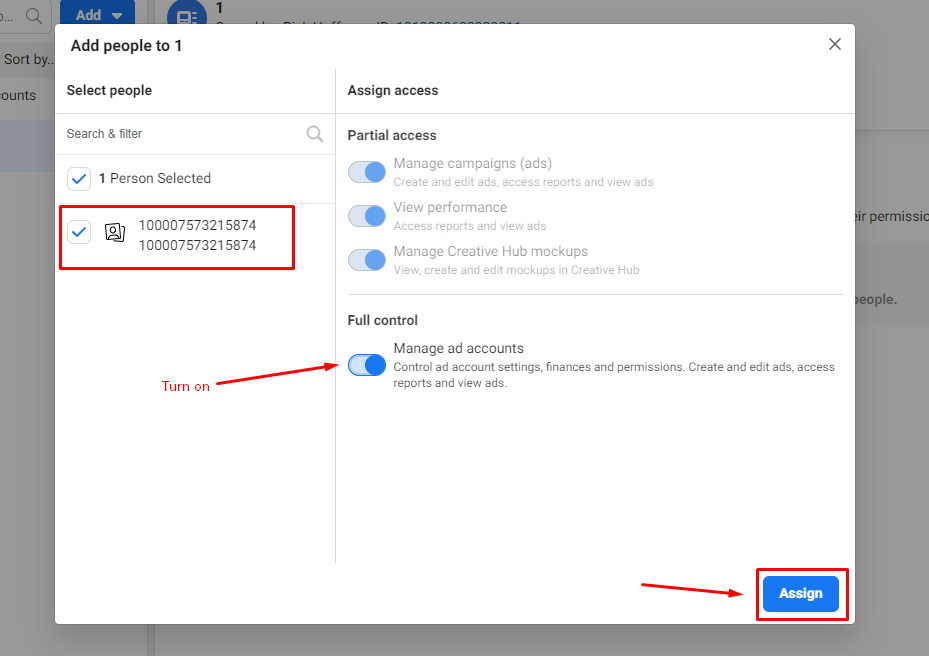
This will be available when your business manager has 2 or more people, you can then add those people to your ad account. You can give them control over what's in that ad account
Set up a new Facebook page or claim ownership of an existing one within BM.
Assign page roles to team members to collaborate on content and strategy.
Basic step-by-step instructions on how to create a Fanpage in business manager or add an existing Fanpage to business manager:
The article you can refer to here.
Discover how to create and share a Facebook Pixel for tracking website conversions and audience insights.
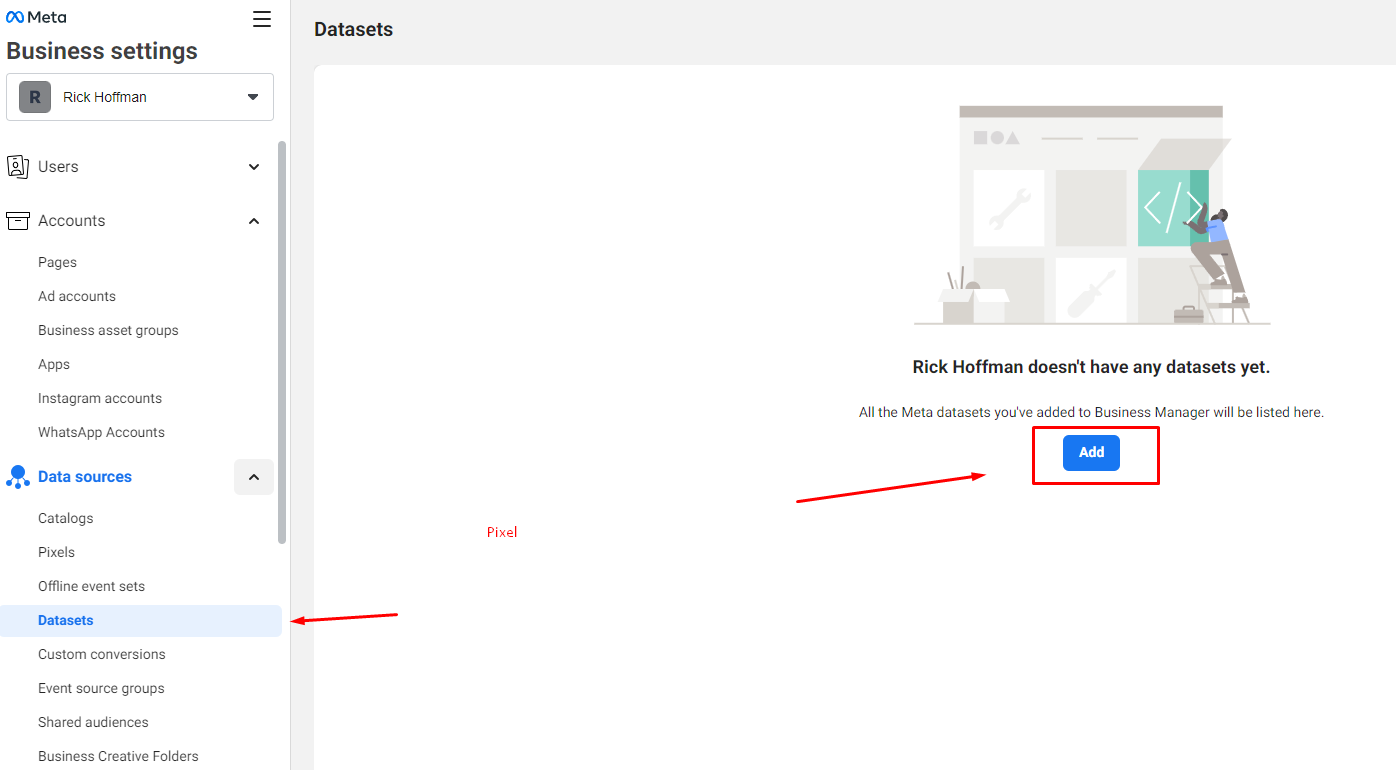
Reference article on how to create Pixel is available at accnice. Refer to that article here
Implement Pixel on your website to gather valuable data for ad targeting.
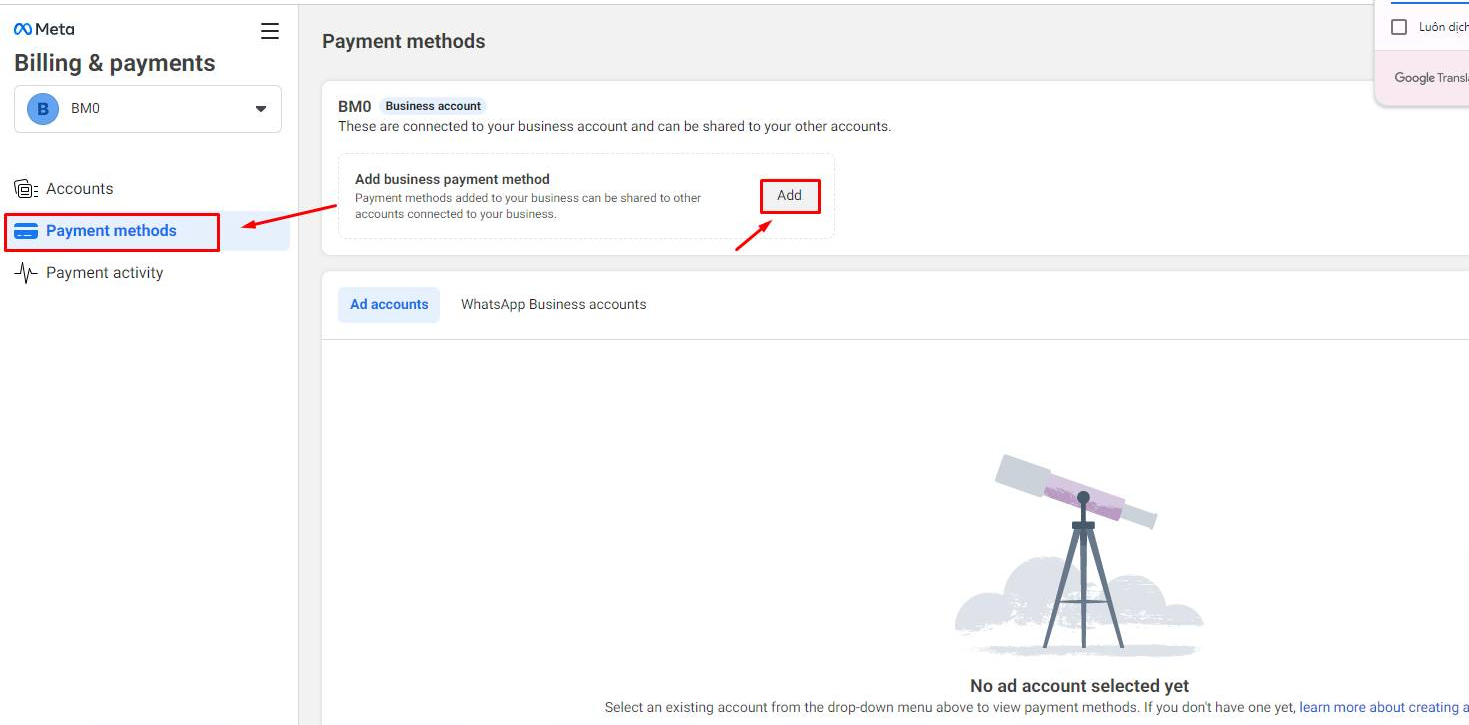
Add payment methods to your BM to streamline ad spend management.
Learn how to assign a payment method to an ad account for seamless transactions.
.png)
Granting Access Safely:
Share your BM access securely by understanding the nuances of role permissions.
Ensure that new users understand their roles and the sensitivity of the data they're handling
I have written instructions on how to share business manager admin rights. You can refer to here.
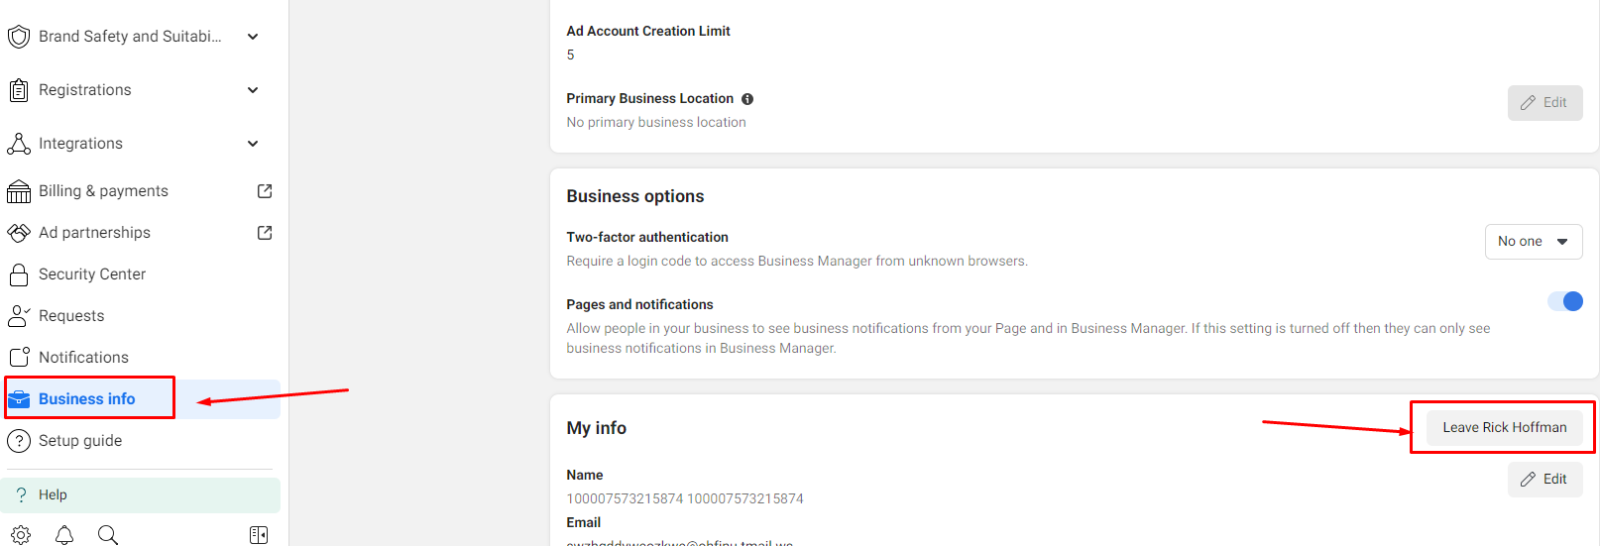
Know the steps to take when removing access from BM, whether it's an employee transition or a change in management.
Conclusion:
Facebook Business Manager can be an indispensable asset for your business's social media strategy. By following these foundational steps, you can set up your BM for success and ensure that your team works cohesively within this powerful platform.

